Introduction
Some AI services have geographic restrictions. To bypass these, you have to use a VPN in that location. While services like NordVPN or ProtonVPN are popular, self-hosting a WireGuard VPN on VPS offers a budget-friendly and private alternative. This guide walks you through setting up a cost-effective WireGuard VPN server and client.
VPN Market Prices
Commercial VPN services vary in price, starting at $6.99 per month for a short-term pricing plan and $2.46 per month for a two-year contract:
| Provider | Price$/1 mo | Price$/1 year | Price$/2 years |
|---|---|---|---|
| Bitdefender | $6.99 (first month only) | $35.04 (first year only) | $104.99 |
| ProtonVPN | $9.99 | $47.88 | $86.16 |
| NordVPN | $12.99 | $59.88 (first year only) | $81.36 |
| Surfshark | $15.45 | $47.85 | $59.13 |
| PureVPN | $19.95 | $84.84 | $97.68 |
VPS market prices
For budget-friendly VPS options, check LowEndTalk . You can find 1 CPU/1GB RAM VPS starting around $10/year. For example, RackNerd offers a 1.5GB RAM VPS for $18.53/year in the USA, France, and Ireland.
Ordering a VPS
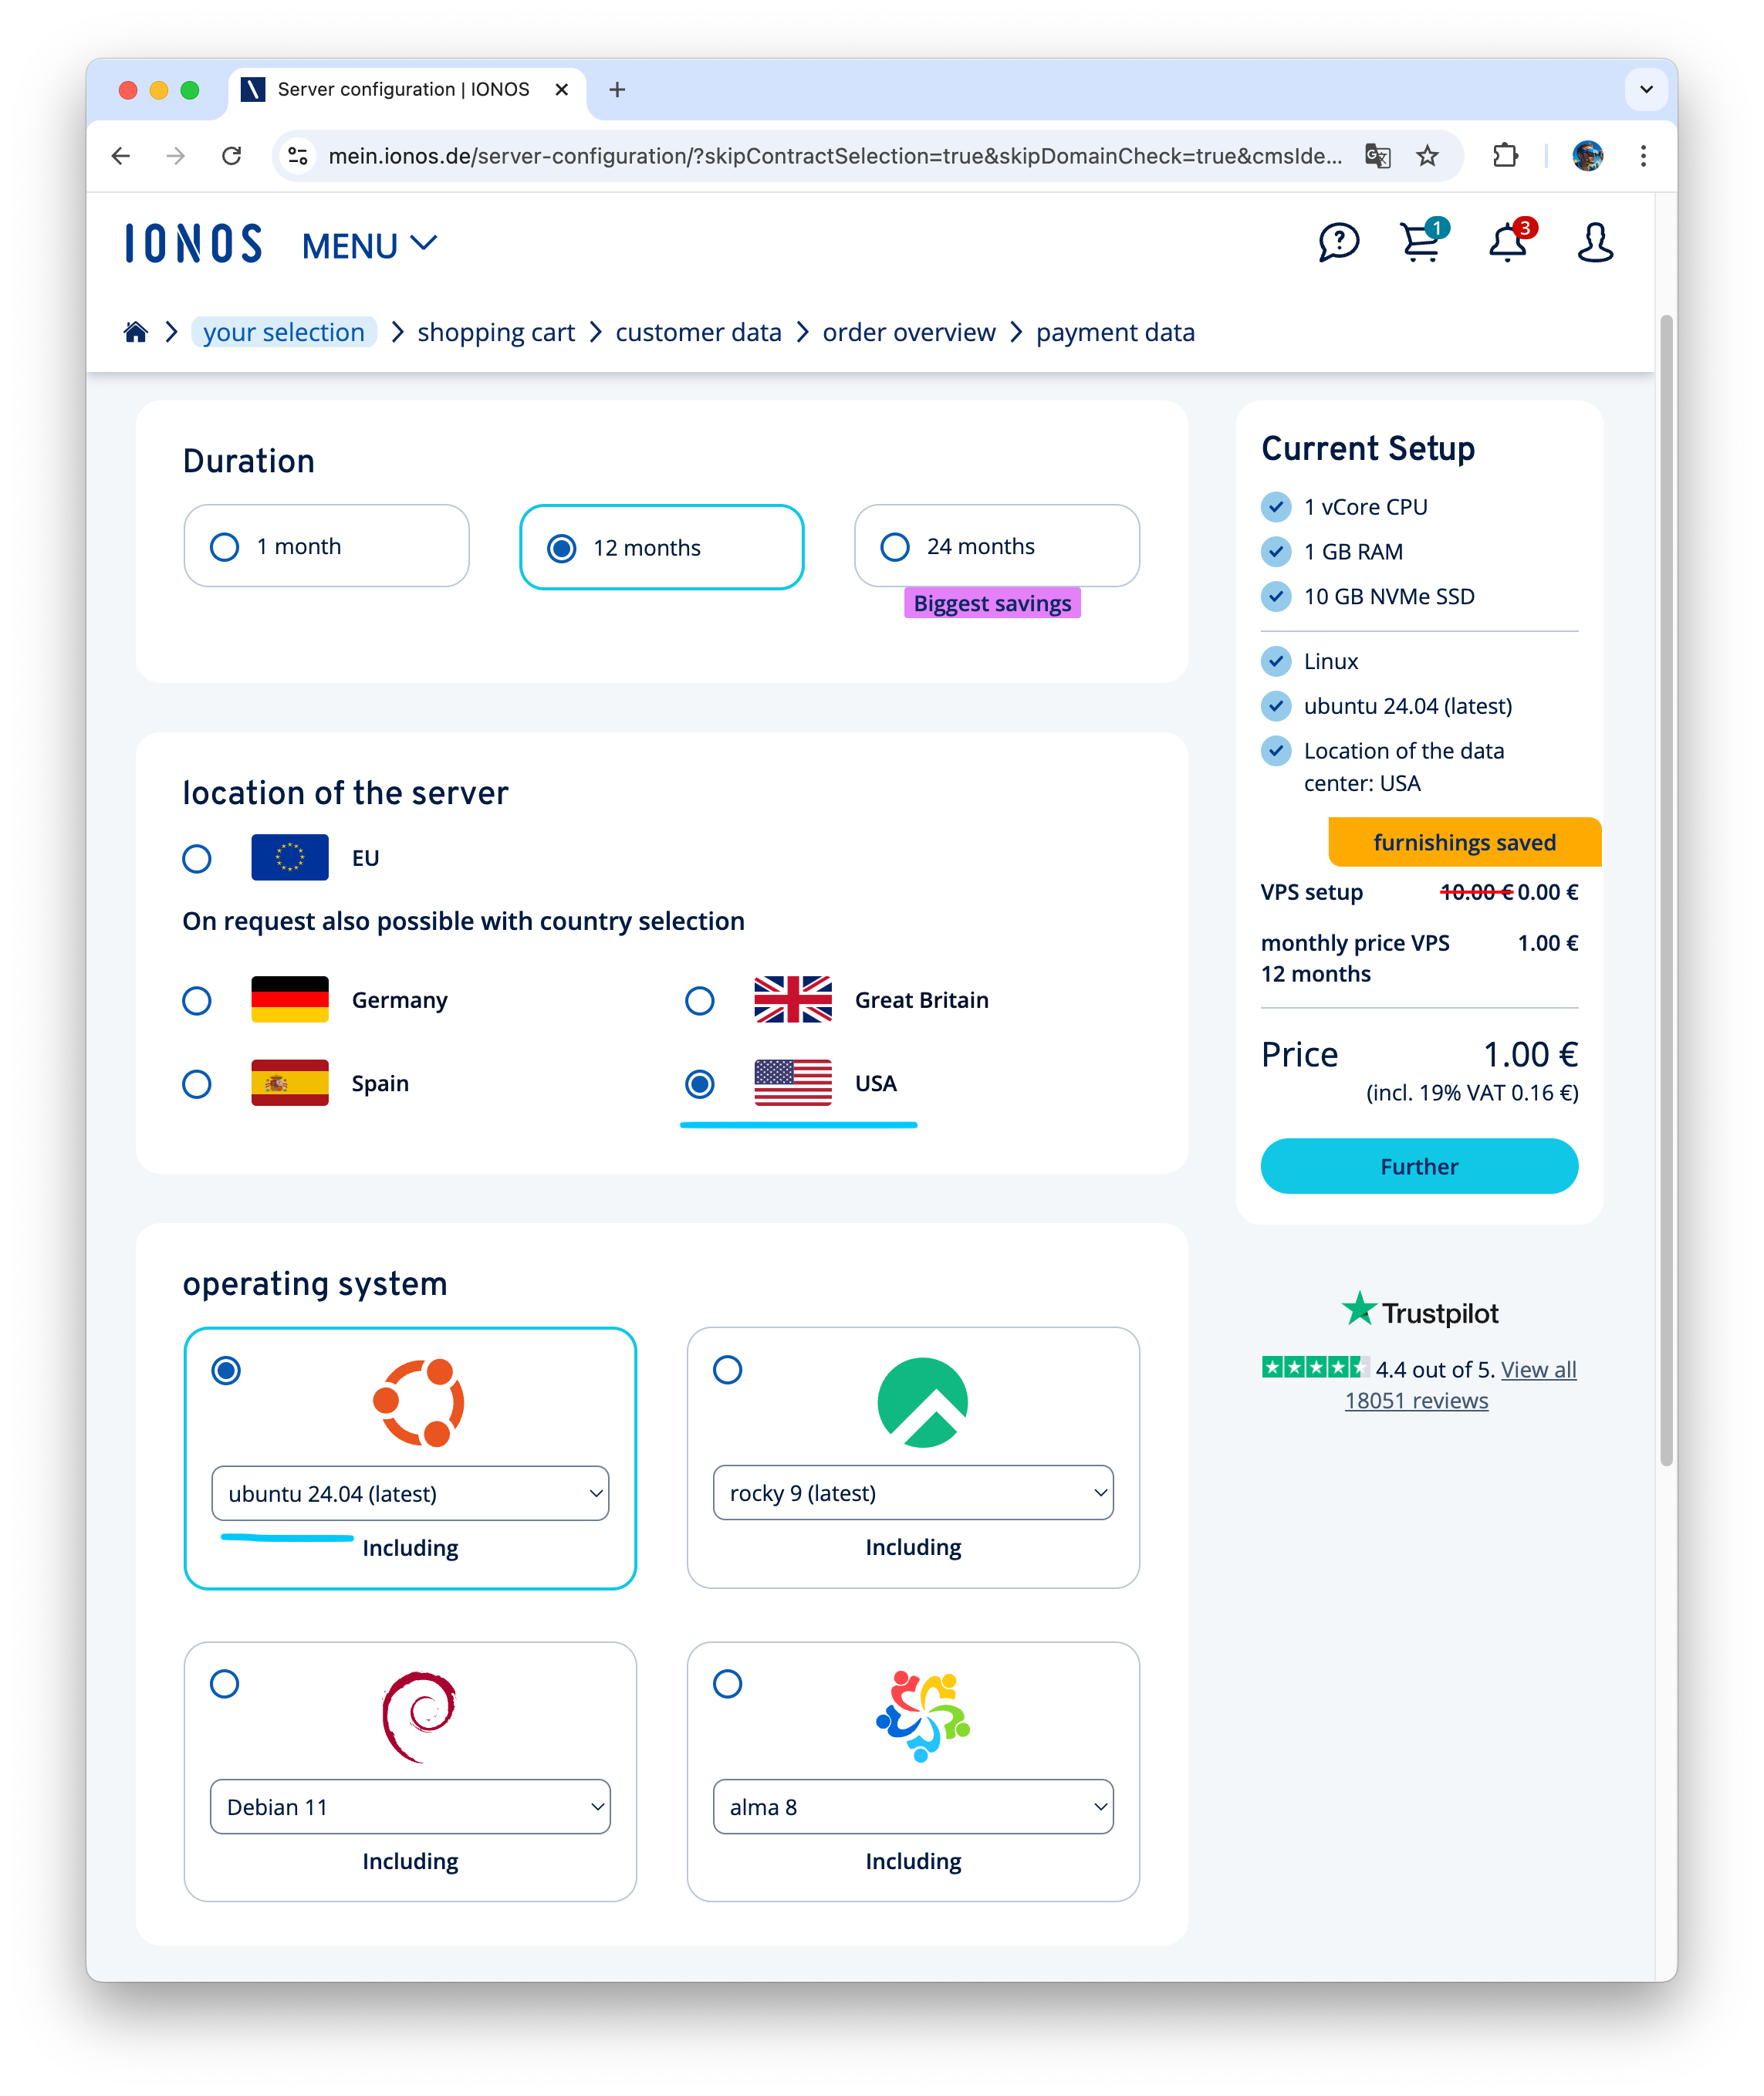
We’ll use an IONOS VPS XS (1 vCore, 1GB RAM) for €1/month (regularly €2/mo ). Choose a US datacenter and Ubuntu 24.04.
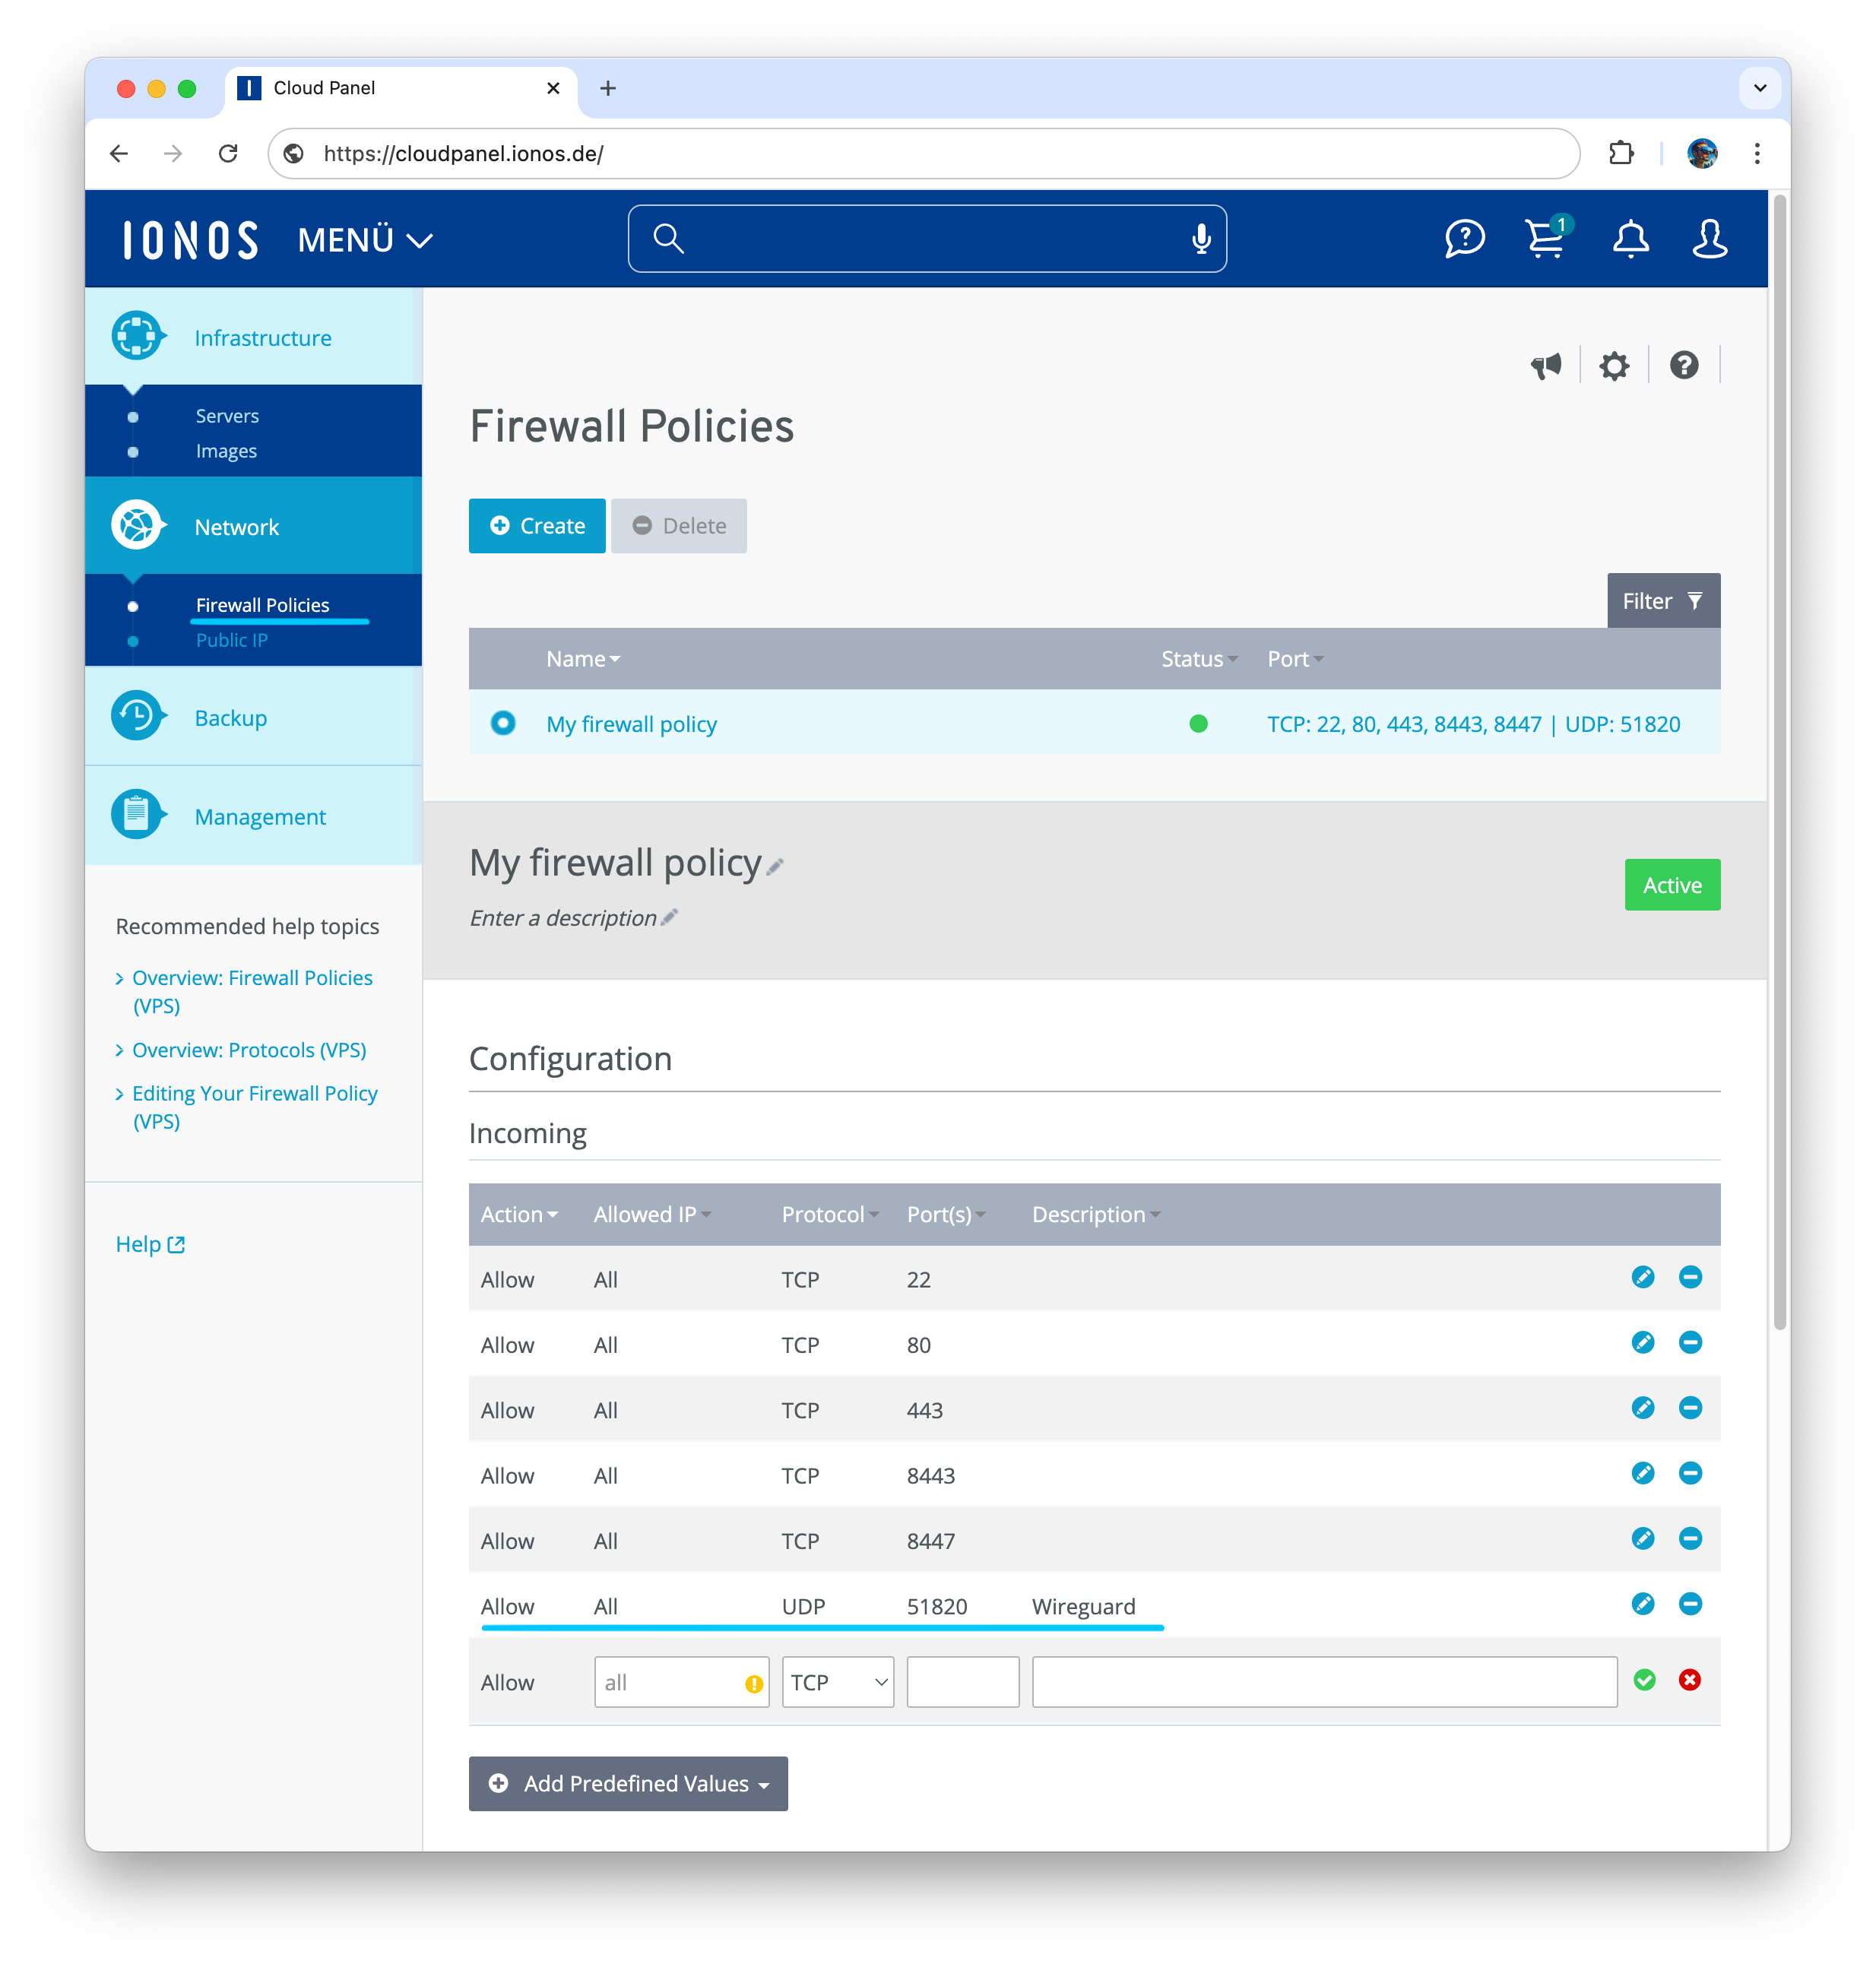
Configuring the Firewall
WireGuard uses port 51820 (UDP). In the IONOS control panel, navigate to Network/Firewall Policies and add an inbound rule for UDP port 51820.
Setting Up SSH Key Authentication
After ordering and account registration you will get access to control panel, where you can find IP address (remote_vps_server) and root password for provisioned VPS. First step is to setup SSH key-based authentication instead of initial password-based.
- Check if you already have ssh key pair
$ ls -al ~/.ssh/id_*.pub- If there are no ssh keys, generate new
$ ssh-keygen -t rsa -b 4096 -C "your@email.tld"- Copy ssh public key to remote VPS
$ ssh-copy-id root@remote_vps_server- Login to VPS using ssh without password
$ ssh root@remote_vps_server- Disable ssh password-based login
$ sed -i 's/#PasswordAuthentication yes/PasswordAuthentication no/g' /etc/ssh/sshd_config
$ sed -i 's/UsePAM yes/UsePAM no/g' /etc/ssh/sshd_config
$ echo "ChallengeResponseAuthentication no" >> /etc/ssh/sshd_config- Restart ssh server
$ sudo systemctl restart sshInstalling WireGuard
- Install Wireguard
$ sudo apt update && sudo apt install wireguard- Enable routing between network interfaces
$ sudo echo "net.ipv4.ip_forward=1" >> /etc/sysctl.conf
$ sudo echo "net.ipv6.conf.all.forwarding=1" >> /etc/sysctl.conf
$ sudo sysctl -p- Get name of network interface, we will use it later
$ ip addr show
...
ip addr show
1: lo: <LOOPBACK,UP,LOWER_UP> mtu 65536 qdisc noqueue state UNKNOWN group default qlen 1000
    link/loopback 00:00:00:00:00:00 brd 00:00:00:00:00:00
    inet 127.0.0.1/8 scope host lo
       valid_lft forever preferred_lft forever
    inet6 ::1/128 scope host noprefixroute
       valid_lft forever preferred_lft forever
2: ens6: <BROADCAST,MULTICAST,UP,LOWER_UP> mtu 1500 qdisc fq_codel state UP group default qlen 1000
    link/ether 01:01:01:01:01:01 brd ff:ff:ff:ff:ff:ff
    altname enp0s6
    inet 11.11.111.111/32 metric 100 scope global dynamic ens6
       valid_lft 545sec preferred_lft 545sec
    inet6 fe80::1:1111:1111:1111/64 scope link
       valid_lft forever preferred_lft forever
...
ens6 is network interface name we need later
Running WireGuard UI (local access in server)
$ curl -sL https://github.com/ngoduykhanh/wireguard-ui/releases/download/v0.6.2/wireguard-ui-v0.6.2-linux-amd64.tar.gz | tar xz
$ BIND_ADDRESS=127.0.0.1:5000 ./wireguard-ui
...
Wireguard UI
App Version     : v0.6.2
Git Commit      : 99104e429557a4cd6bda4b0c2550a656cdfe9bb7
Git Ref         : refs/tags/v0.6.2
Build Time      : 11-01-2025 18:57:33
Git Repo        : https://github.com/ngoduykhanh/wireguard-ui
Authentication  : true
Bind address    : 127.0.0.1:5000
Email from      :
Email from name : WireGuard UI
Custom wg.conf  :
Base path       : /
Subnet ranges   :
Valid subnet ranges:
⇨ http server started on 127.0.0.1:5000
...
Starting the WireGuard Server
- Start and enable Wireguard server
sudo systemctl start wg-quick@wg0
sudo systemctl status wg-quick@wg0
sudo systemctl enable wg-quick@wg0- If the VPS has an OS-based firewall like ufw, firewall should be disabled or rules need to be configured
Binding remote port locally and open WireGuard UI
- We can use SSH port forwarding to access Winguard UI. Just run on your local workstation
$ ssh -L 5000:localhost:5000 root@remote_vps_server- Open WireGuard UI locally at http://localhost:5000/
- Login as admin:admin
- In Wireguard Server Settings set Post Up Script and Post Down Script using network interface name (ens6, might differ depending on the VPS provider and operating system)
PostUp = iptables -A FORWARD -i wg0 -j ACCEPT; iptables -t nat -A POSTROUTING -o ens6 -j MASQUERADE;
PostDown = iptables -D FORWARD -i wg0 -j ACCEPT; iptables -t nat -D POSTROUTING -o ens6 -j MASQUERADE;
- Apply config
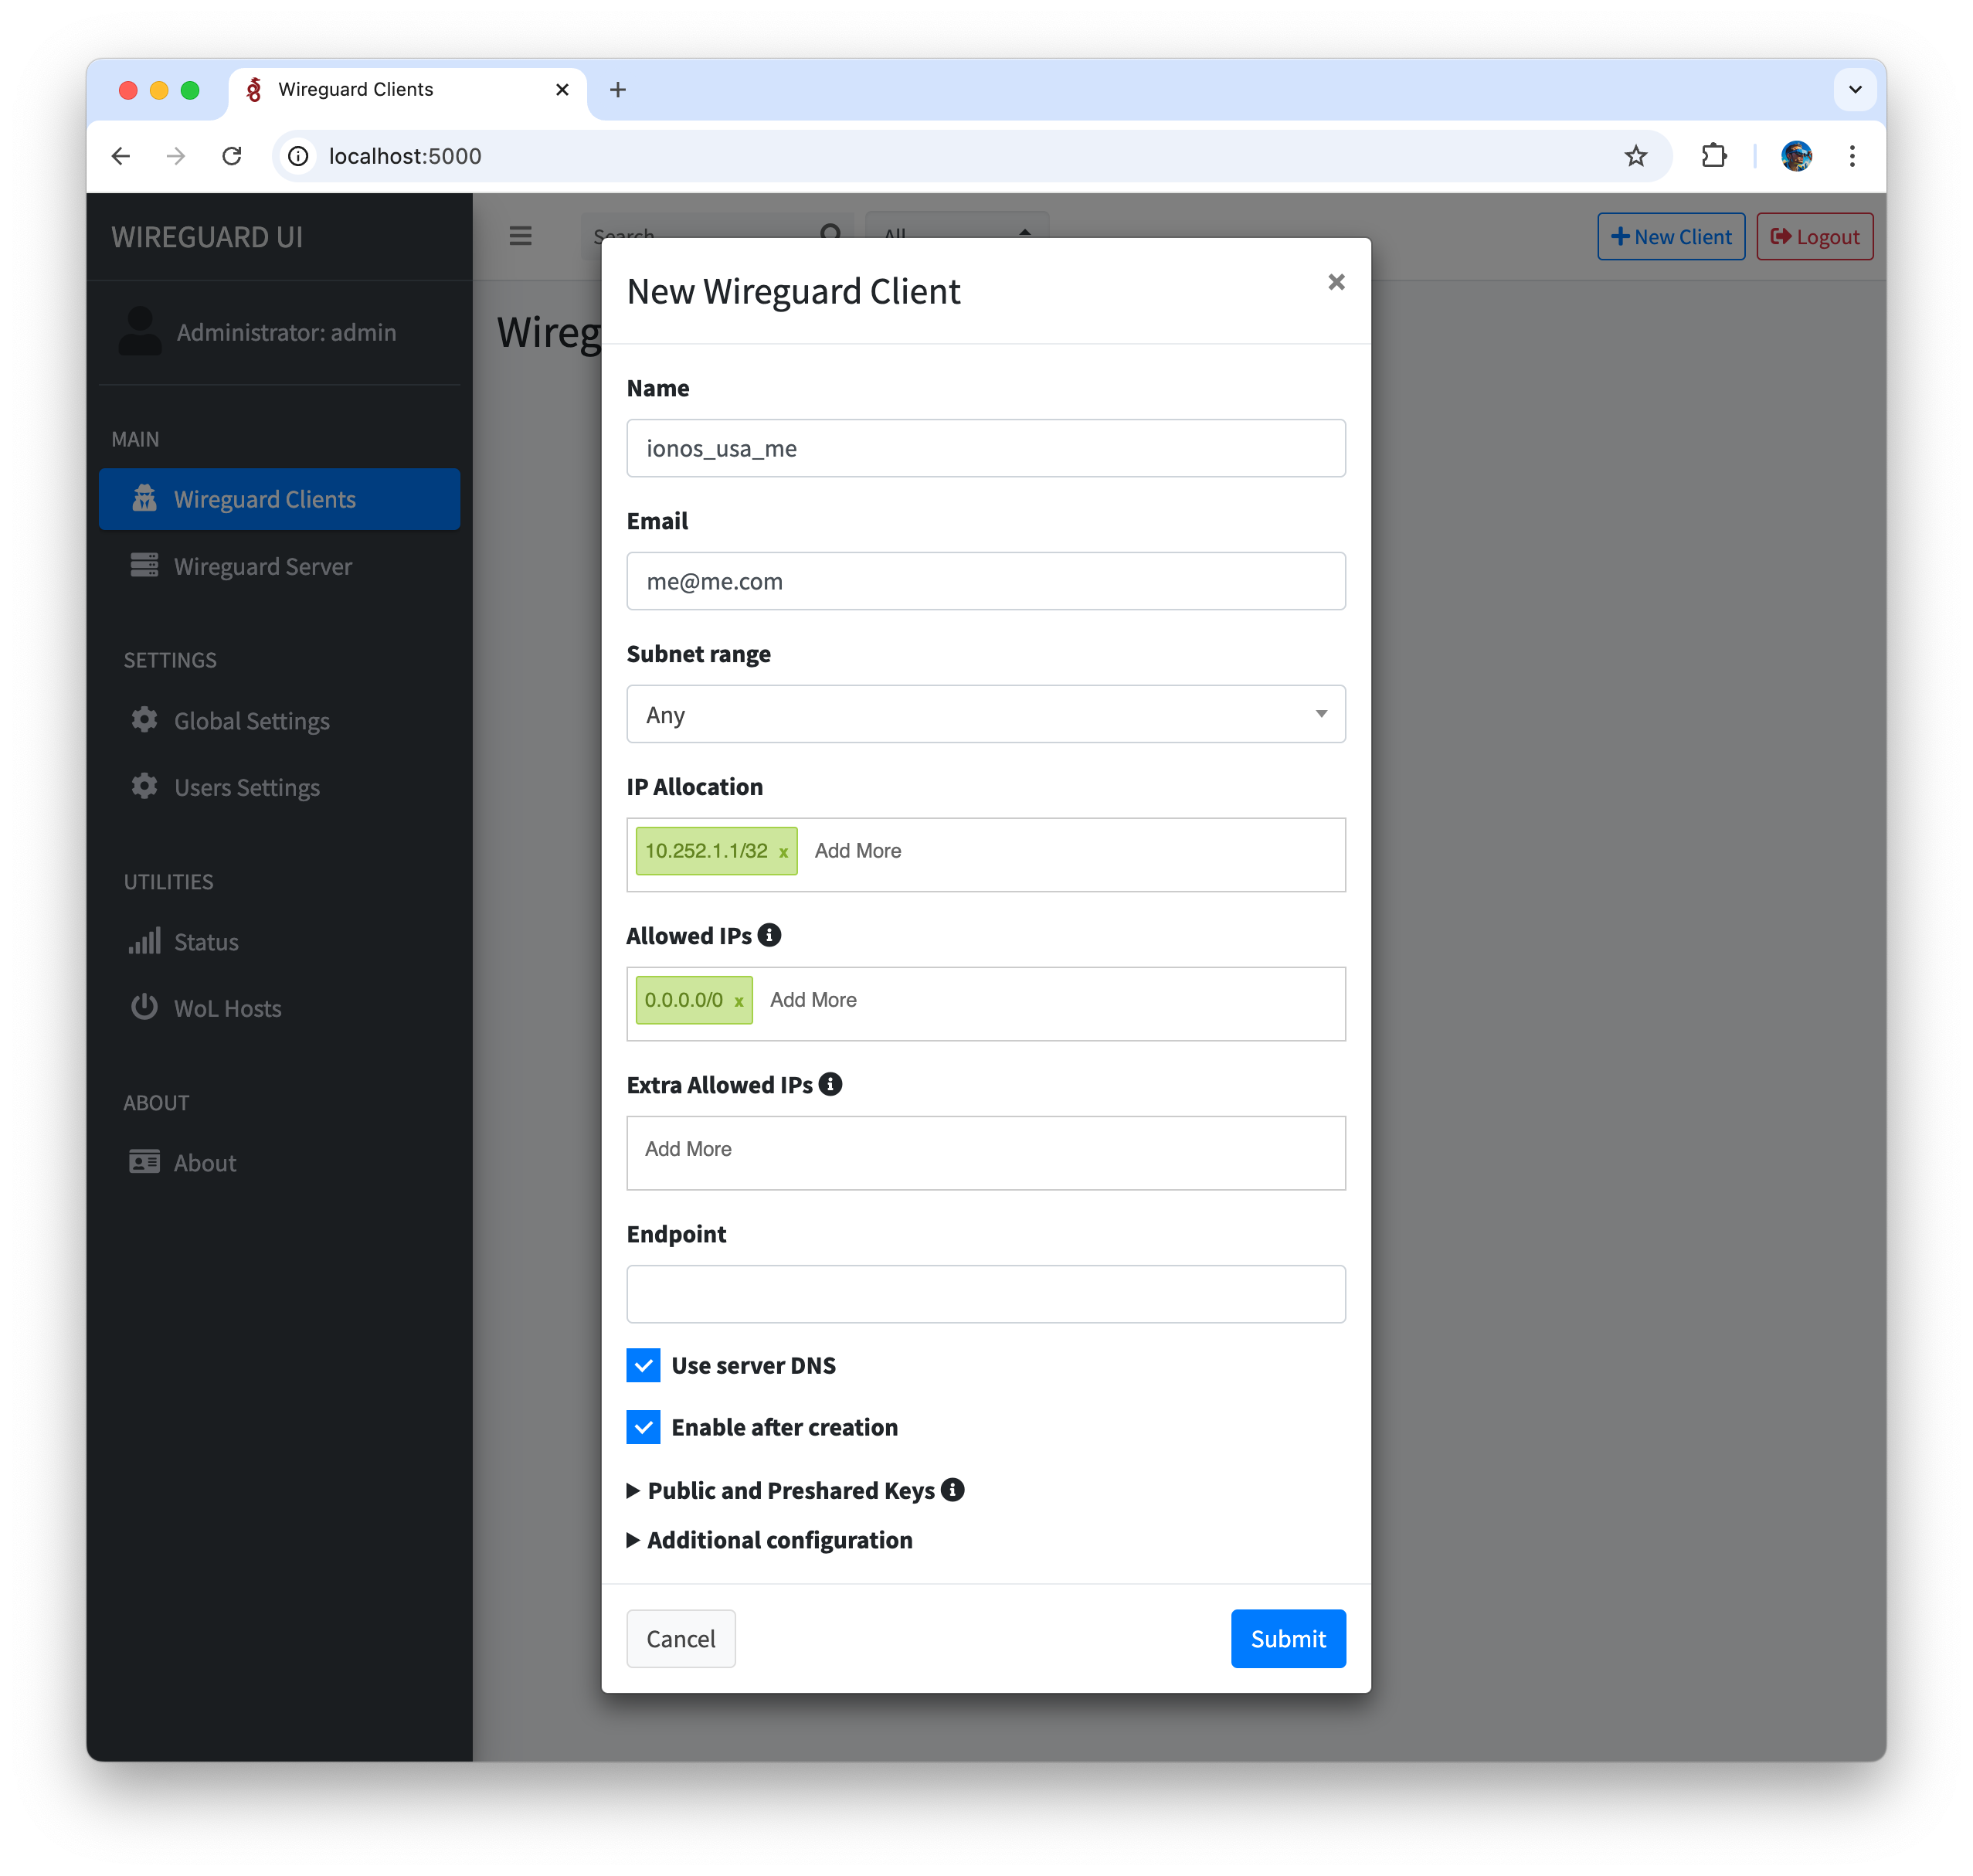
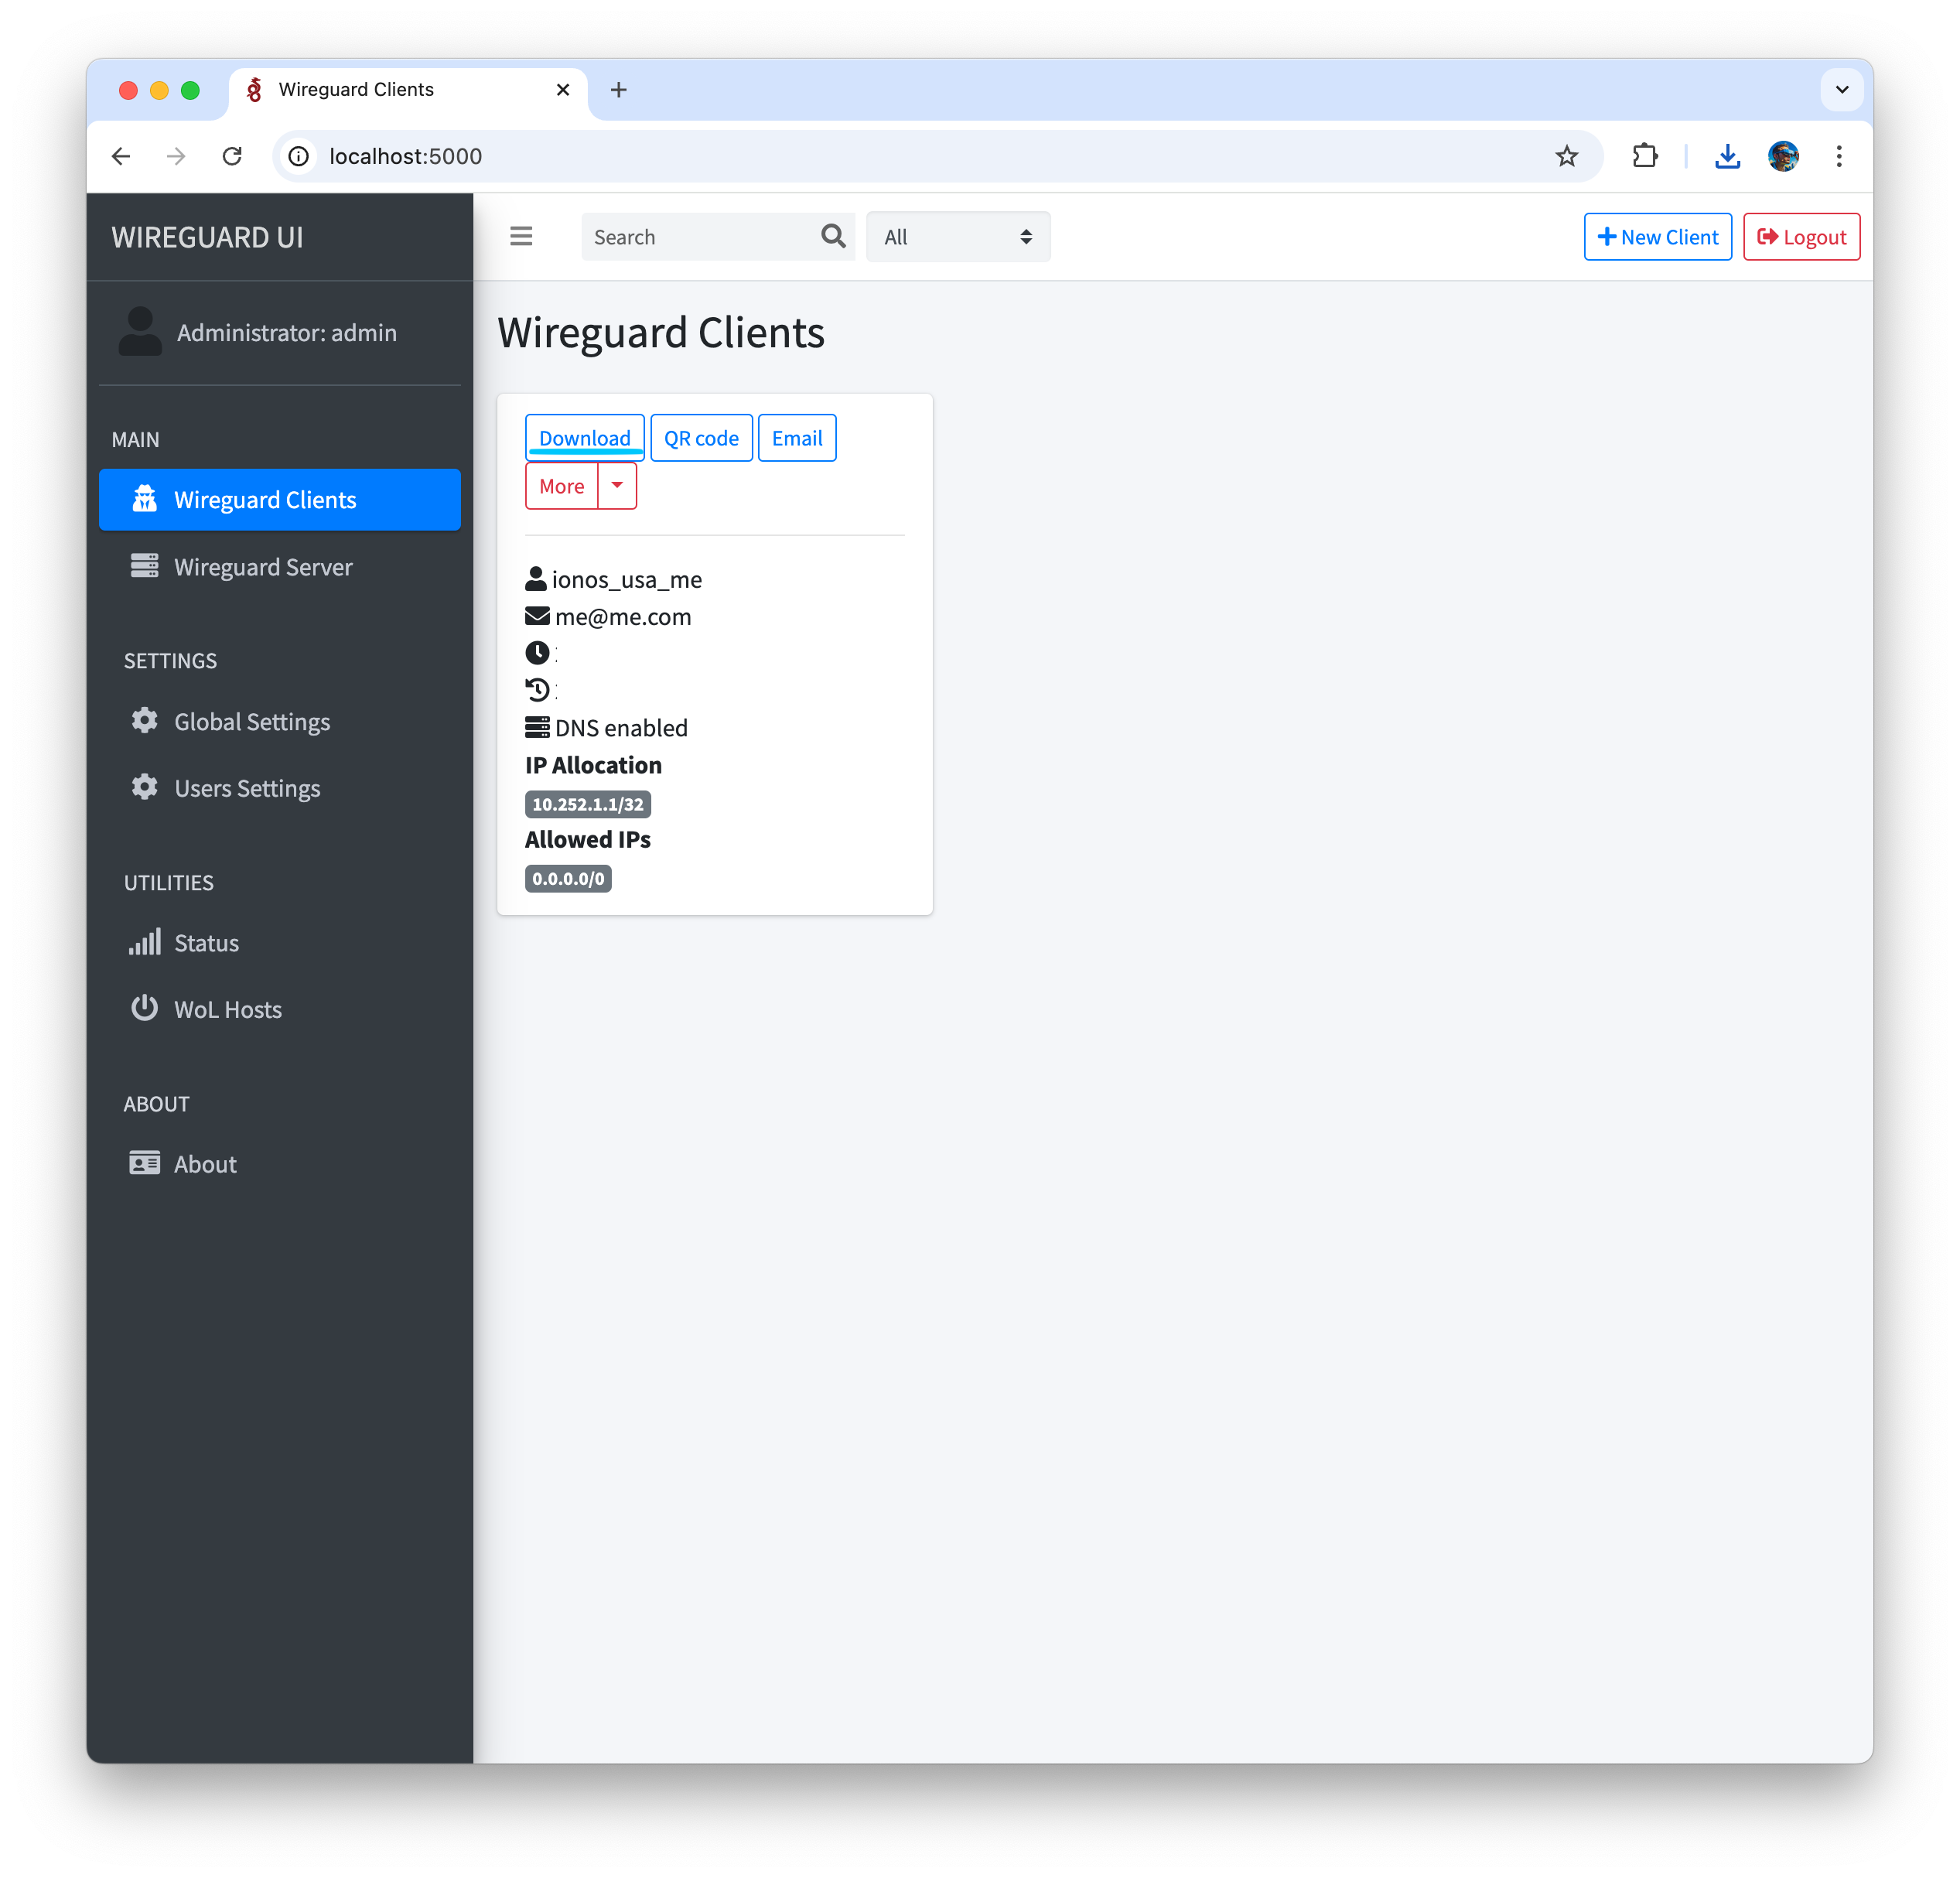
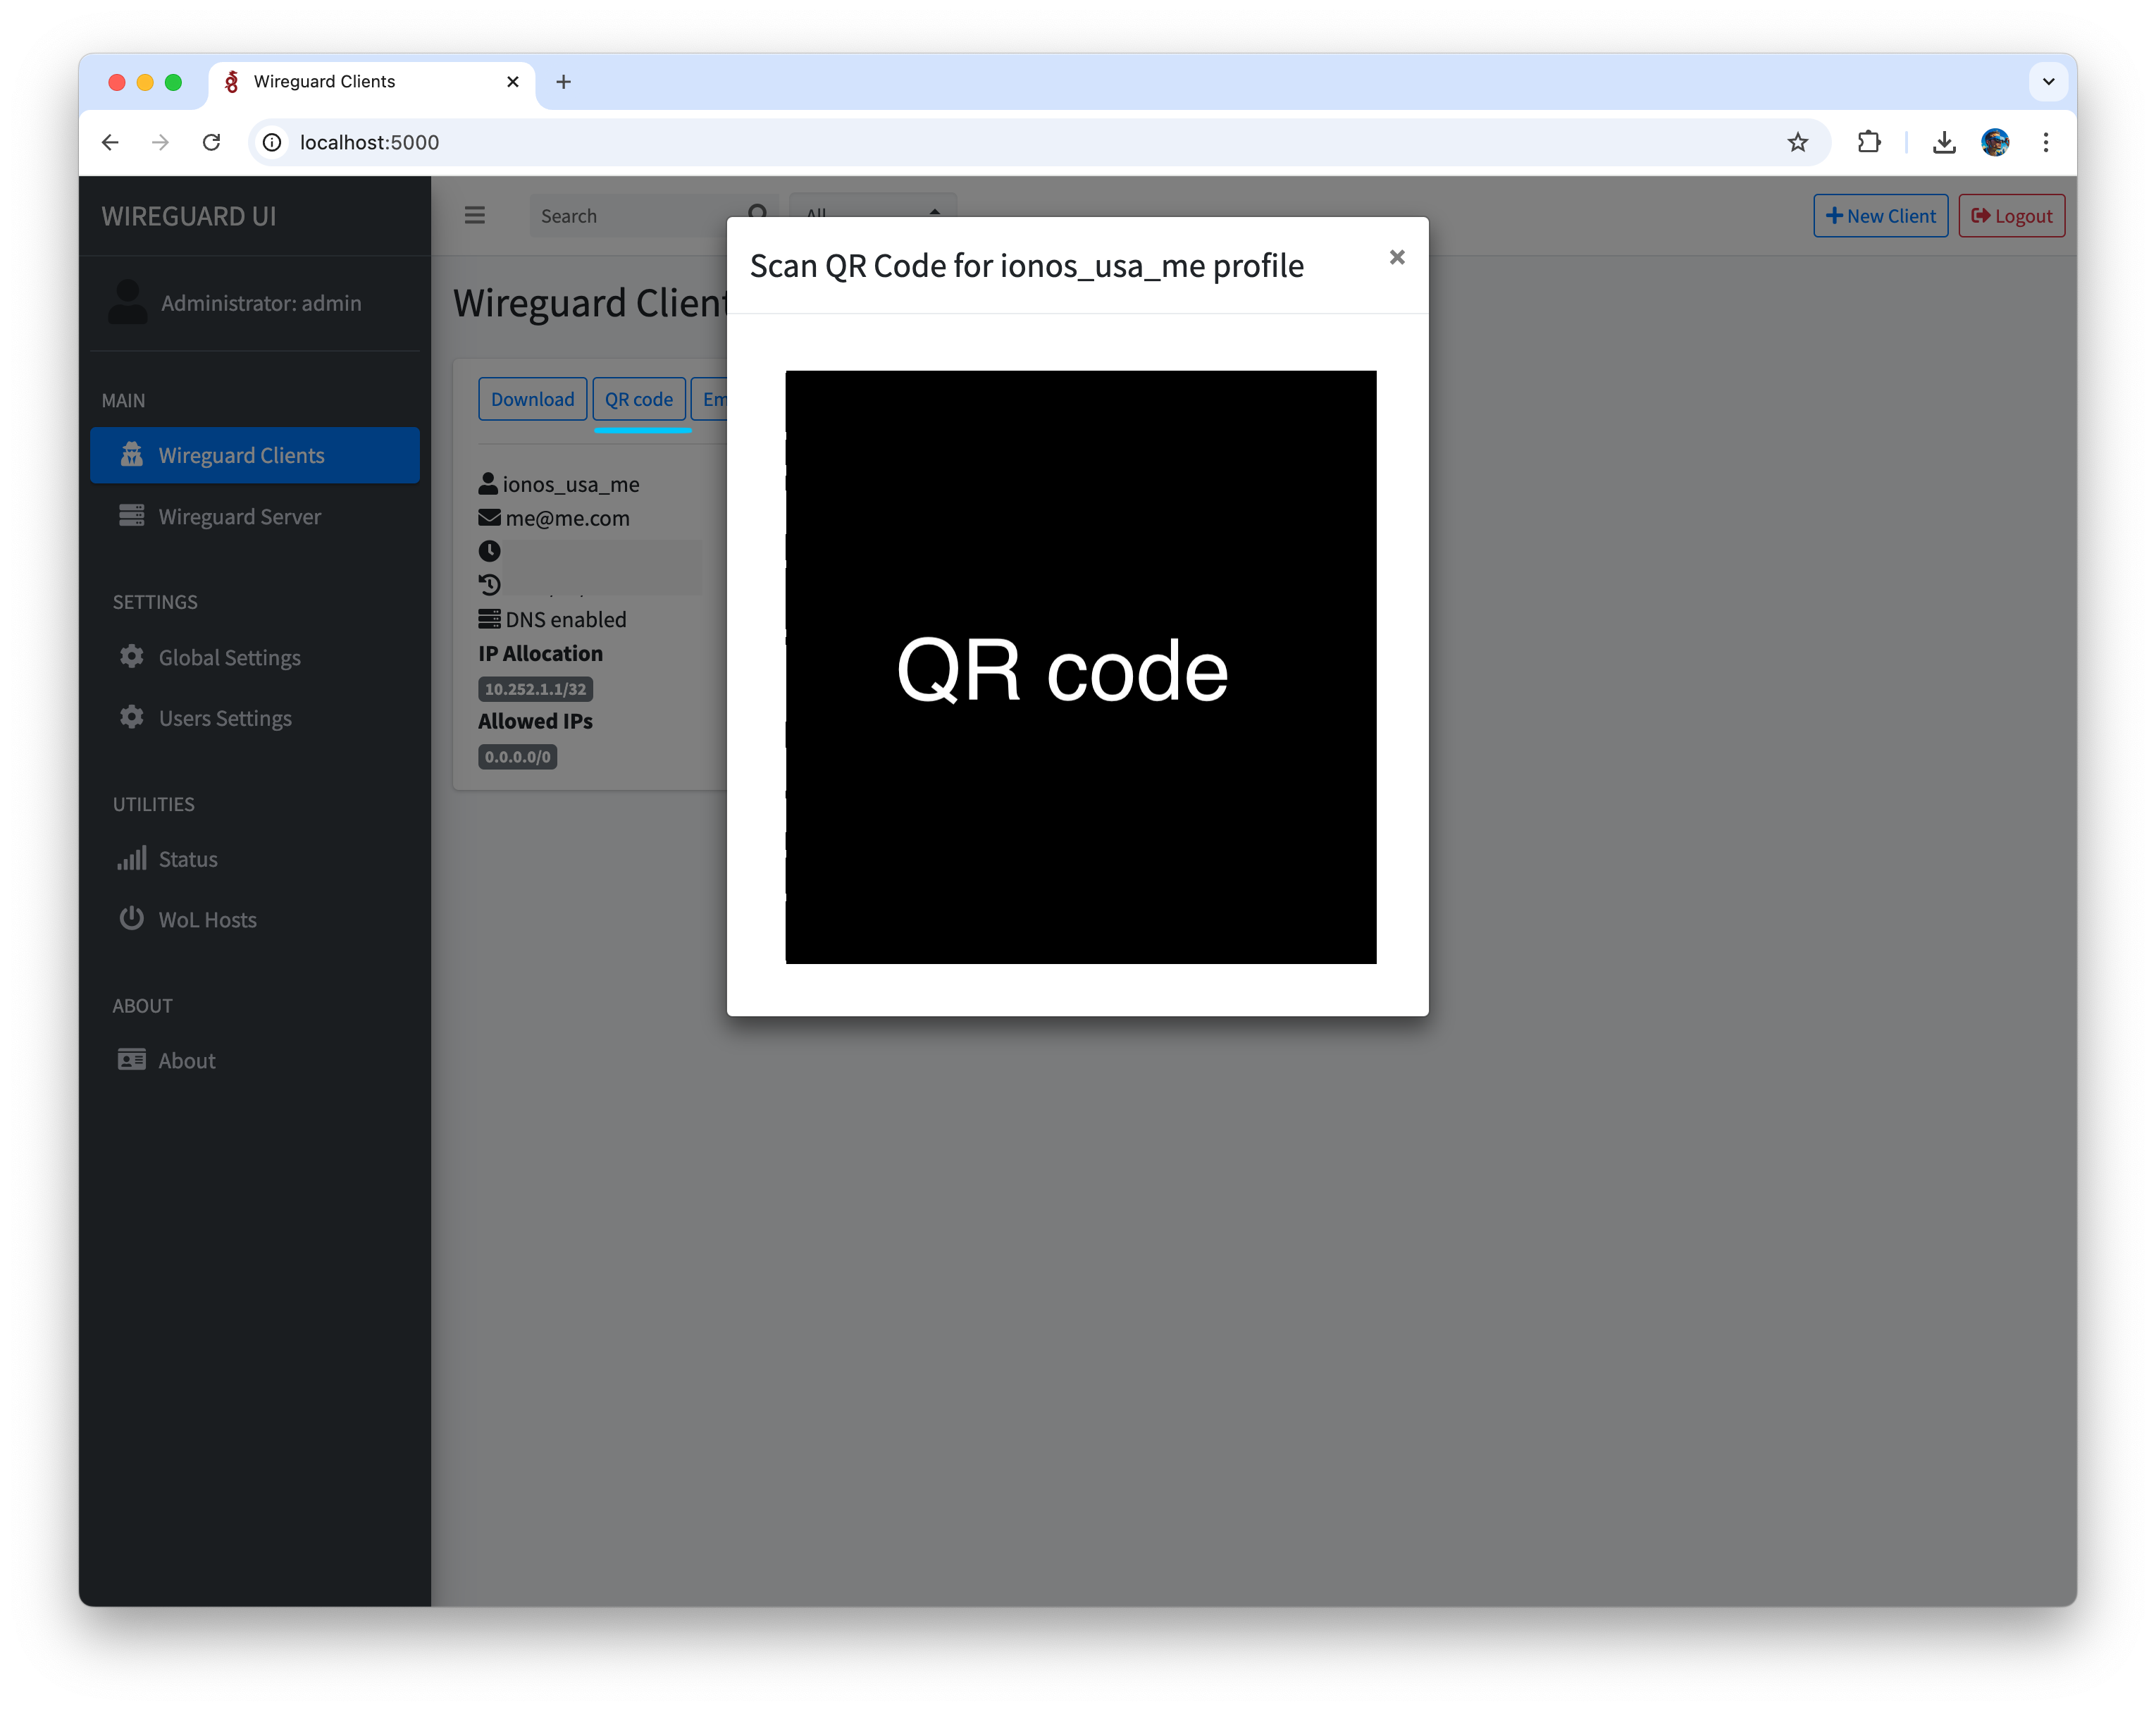
Creating a WireGuard Client
- Go to Wireguard Client menu in Wireguard UI, click on New Wireguard Client, enter Name, Email, click Submit, Apply
- Restart wireguard server
$ sudo systemctl restart wg-quick@wg0Configuring the Client (Desktop)
- Download and install Wireguard client
- Save wireguard client configuration locally in Wireguard UI by clicking on “Download” button
- Import configuration in Wireguard
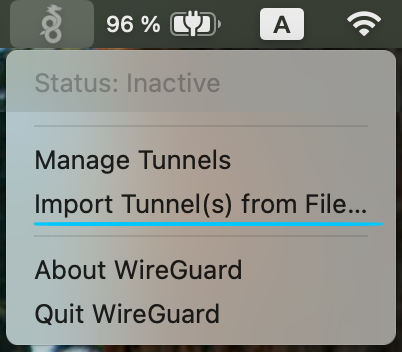
- Select connection and connect
- Open https://whatismyipaddress.com/ to check your public IP, it should be remote_vps_server
Configuring the Client (Mobile)
- Install Wireguard client on your mobile phone
- Get QR code with connection configuration from Wireguard UI
- Open WireGuard application and create connection from QR code
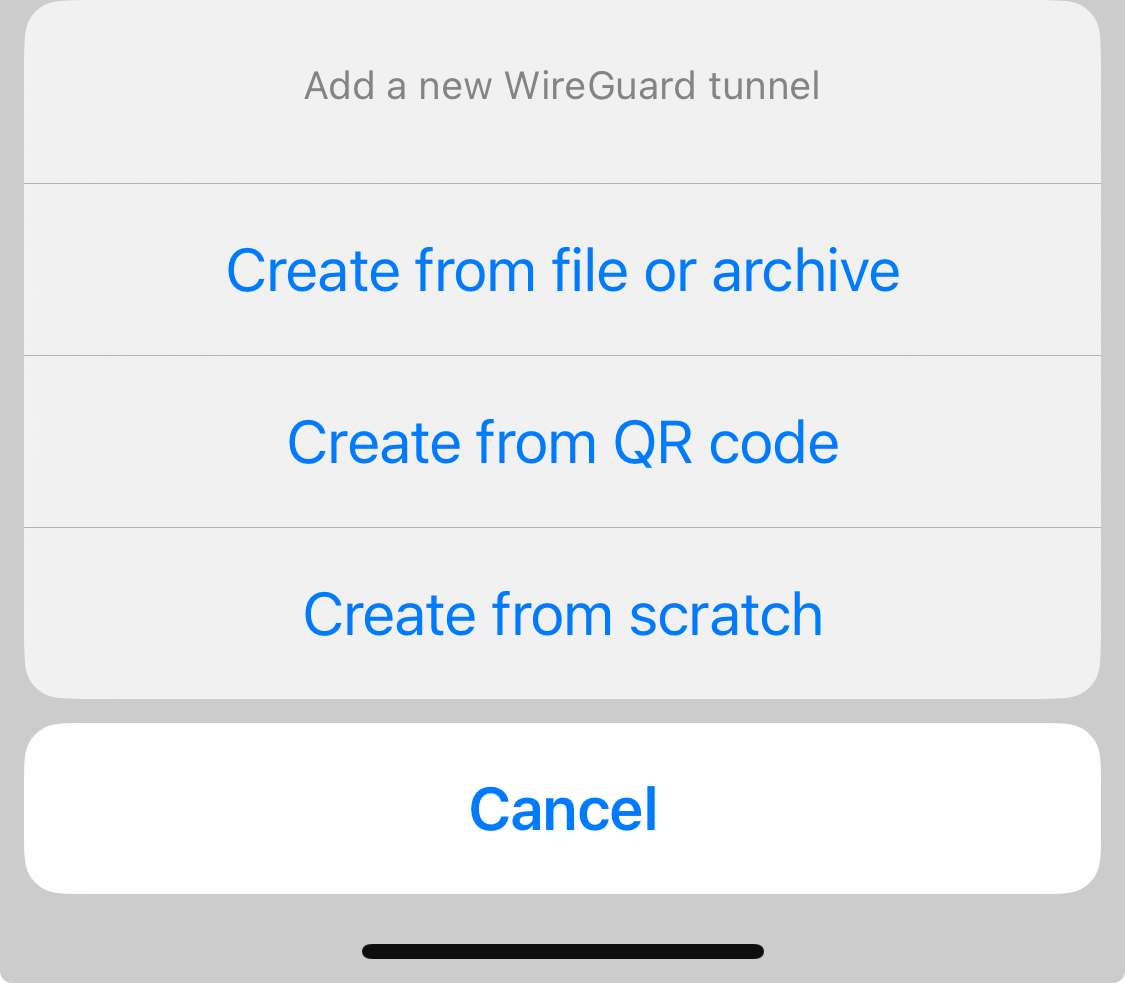
- Select connection and connect
Conclusion
Setting up a private WireGuard VPN is straightforward with SSH port forwarding and WireGuard UI.
Enjoy a fast and secure connection!